Team
Overview
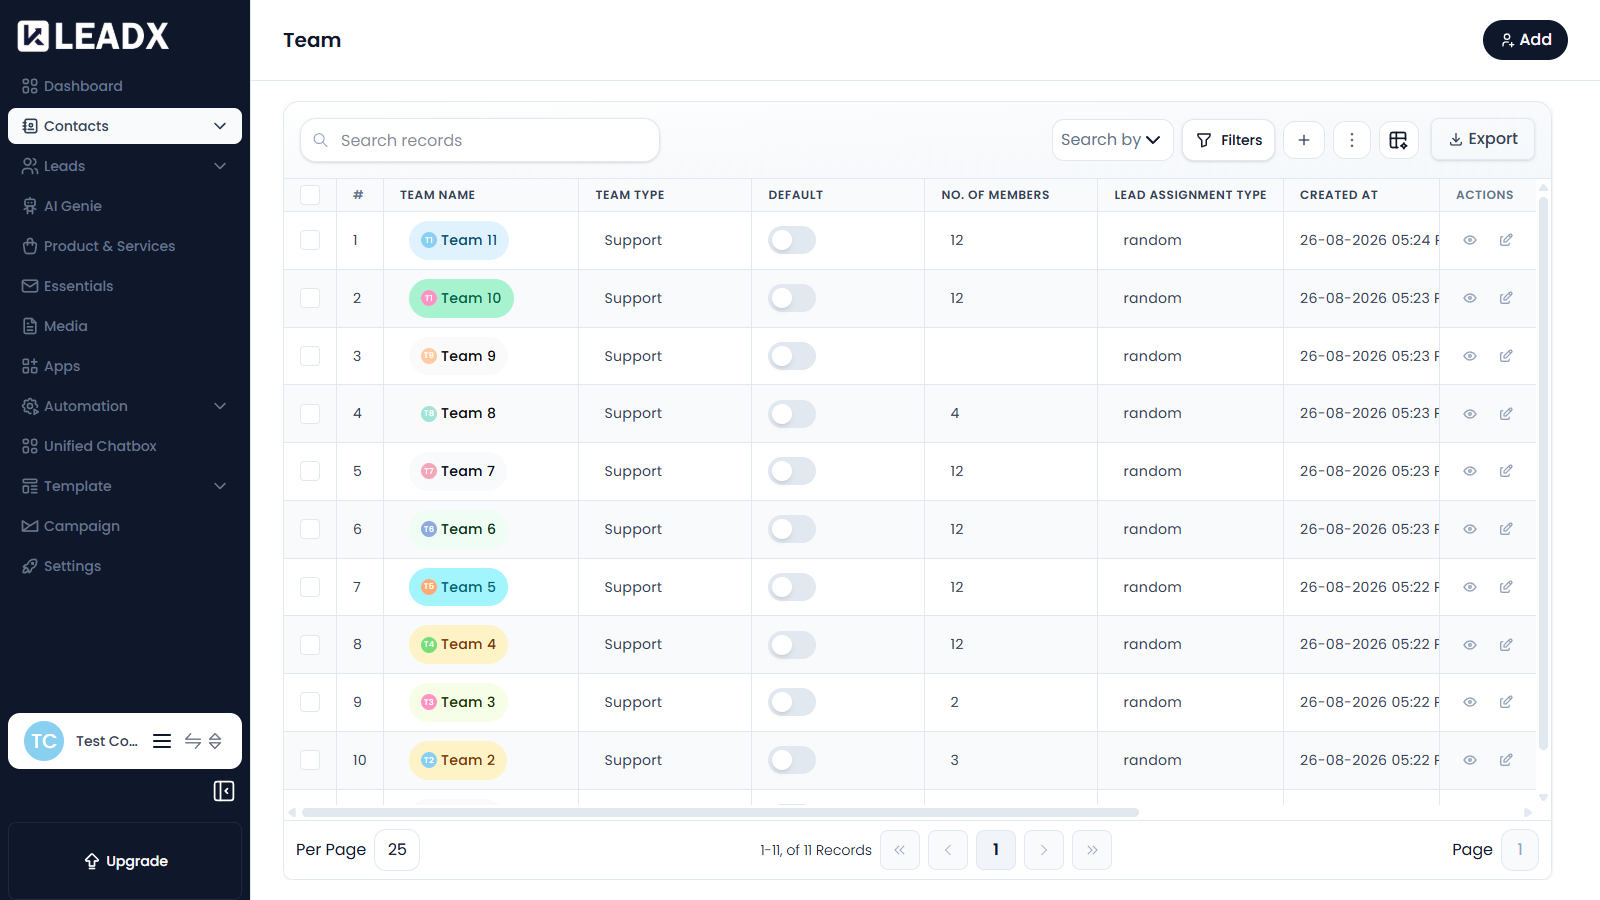
The Team page is where you group members into teams. A team does two jobs in LeadX:
- It organises your members, so you can see who belongs to which part of the business.
- It decides how incoming leads are shared out between those members, through the team's lead assignment type.
Access
- Navigation path:
Sidebar > Contacts > Team - Route:
/team - Access: available to users who can view teams.
Prerequisites
Before you create a team, the people you want in it must already be members of your workspace. Invite them first from Member Management — only accepted members can be added to a team.
Add A Team
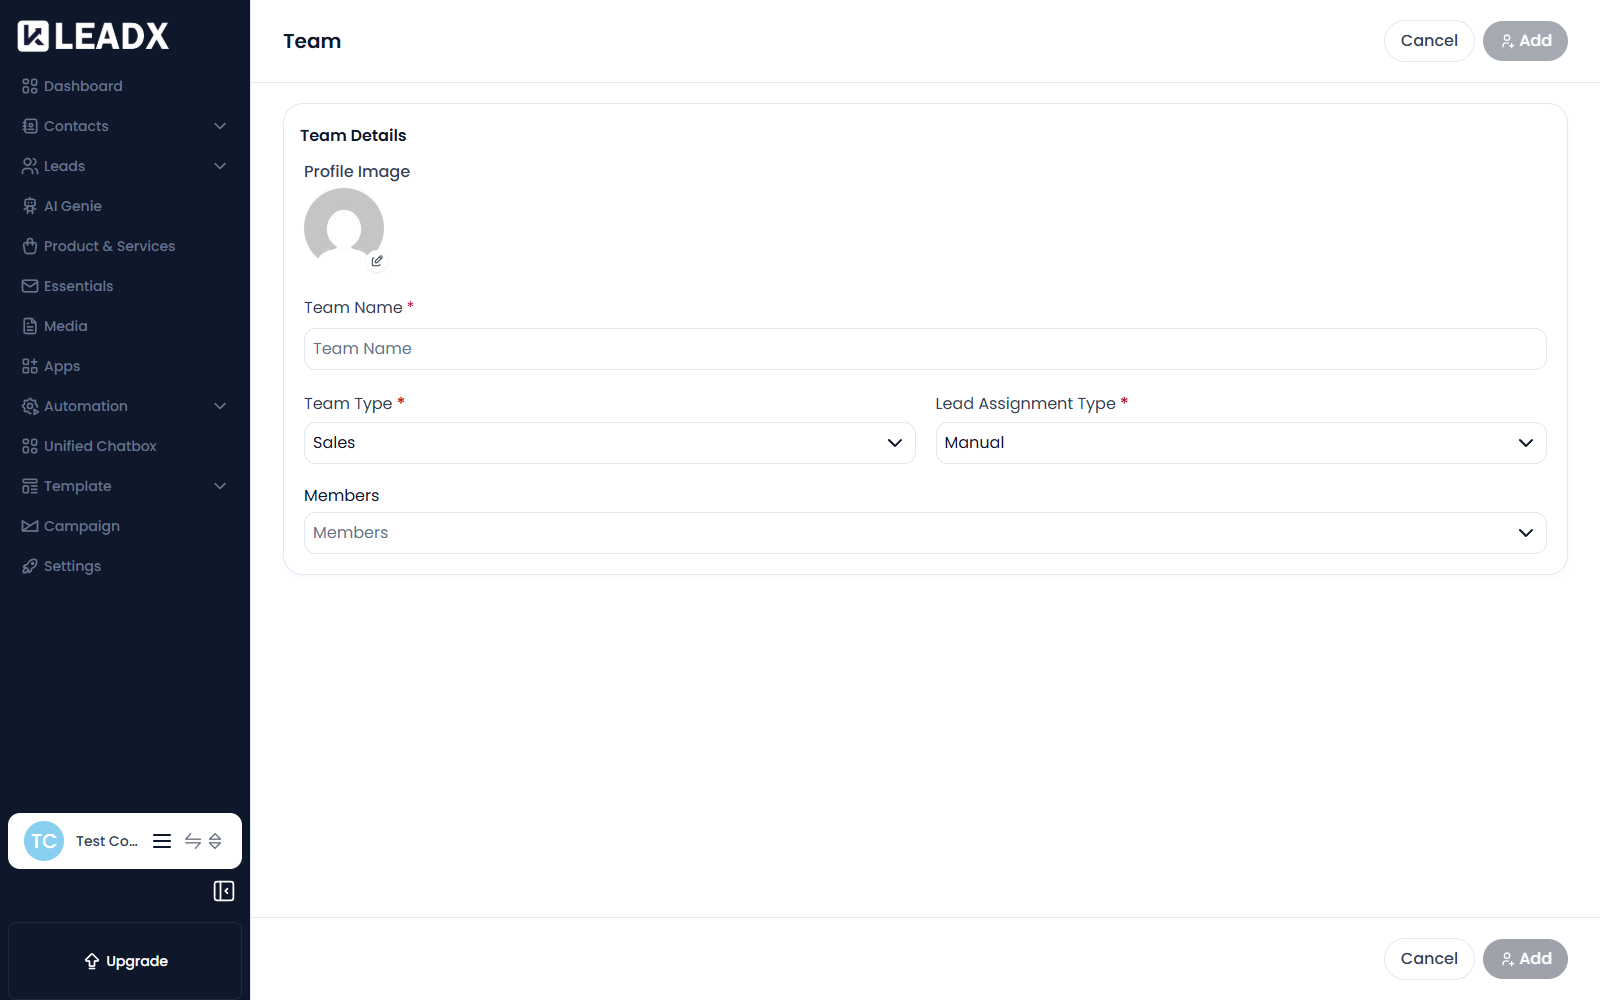
Click Add in the top right to open the team form.
Fields On The Form
Profile Image An optional picture for the team, used to identify it visually in lists.
Team Name (required)
The name your team will be known by, for example Inbound Sales or Support Desk.
Team Type (required) What kind of team this is. Choose one of:
| Option | Use it for |
|---|---|
Sales | Members who work opportunities and close deals |
Support | Members who handle customer questions and issues |
Marketing | Members who run campaigns and outreach |
Lead Assignment Type (required) This is the important one — it controls how a new lead is given to a member of this team:
| Option | What happens |
|---|---|
Manual | Leads are not handed out automatically. Someone assigns each lead by hand. |
Random | Each new lead goes to a randomly chosen member of the team. |
Round Robin | Leads are handed out in turn, one after another, so everyone gets an even share. |
Members
A checkbox list of everyone in your workspace, shown as name, email and contact number. Tick the people who belong to this team. Use Select All to add everyone at once.
Steps
- Click
Add. - Upload a profile image if you want one.
- Enter the Team Name.
- Choose the Team Type.
- Choose the Lead Assignment Type.
- Tick the Members who belong to this team.
- Click
Addto save.
Click Cancel at any point to leave without saving.
Edit A Team
- Find the team in the list.
- Click the edit action on its row, or use the inline
EDITcontrol that appears on an editable cell when you hover over it. - Change any of the fields described above.
- Save your changes.
Inline editing is useful for quick changes such as swapping the lead assignment type, without opening the whole form.
Delete A Team
- Find the team in the list.
- Open the row actions and choose delete.
- Confirm in the popup.
Deleting a team does not delete its members — they stay in your workspace and simply no longer belong to that team.
Table Details
| Column | Meaning |
|---|---|
| Team Name | The team's short code and name |
| Team Type | Sales, Support or Marketing |
| Default | Whether this is the default team |
| No. Of Members | How many members are in the team |
| Lead Assignment Type | Manual, Random or Round Robin |
| Created At / Created By | When the team was made, and by whom |
| Updated At / Last Updated By | When it last changed, and by whom |
| Actions | Edit and delete controls |
Toolbar
Search by— search the team listFilters— narrow the list to matching teamsExport— download the list
Helpful Notes
- The lead assignment type only matters when leads actually arrive for the team — it has no effect on leads already assigned.
Round Robinis the usual choice when you want workload shared evenly;Randomis simpler but can be uneven over small numbers of leads.- A team with no members cannot receive automatically assigned leads.