Add Campaign
Overview
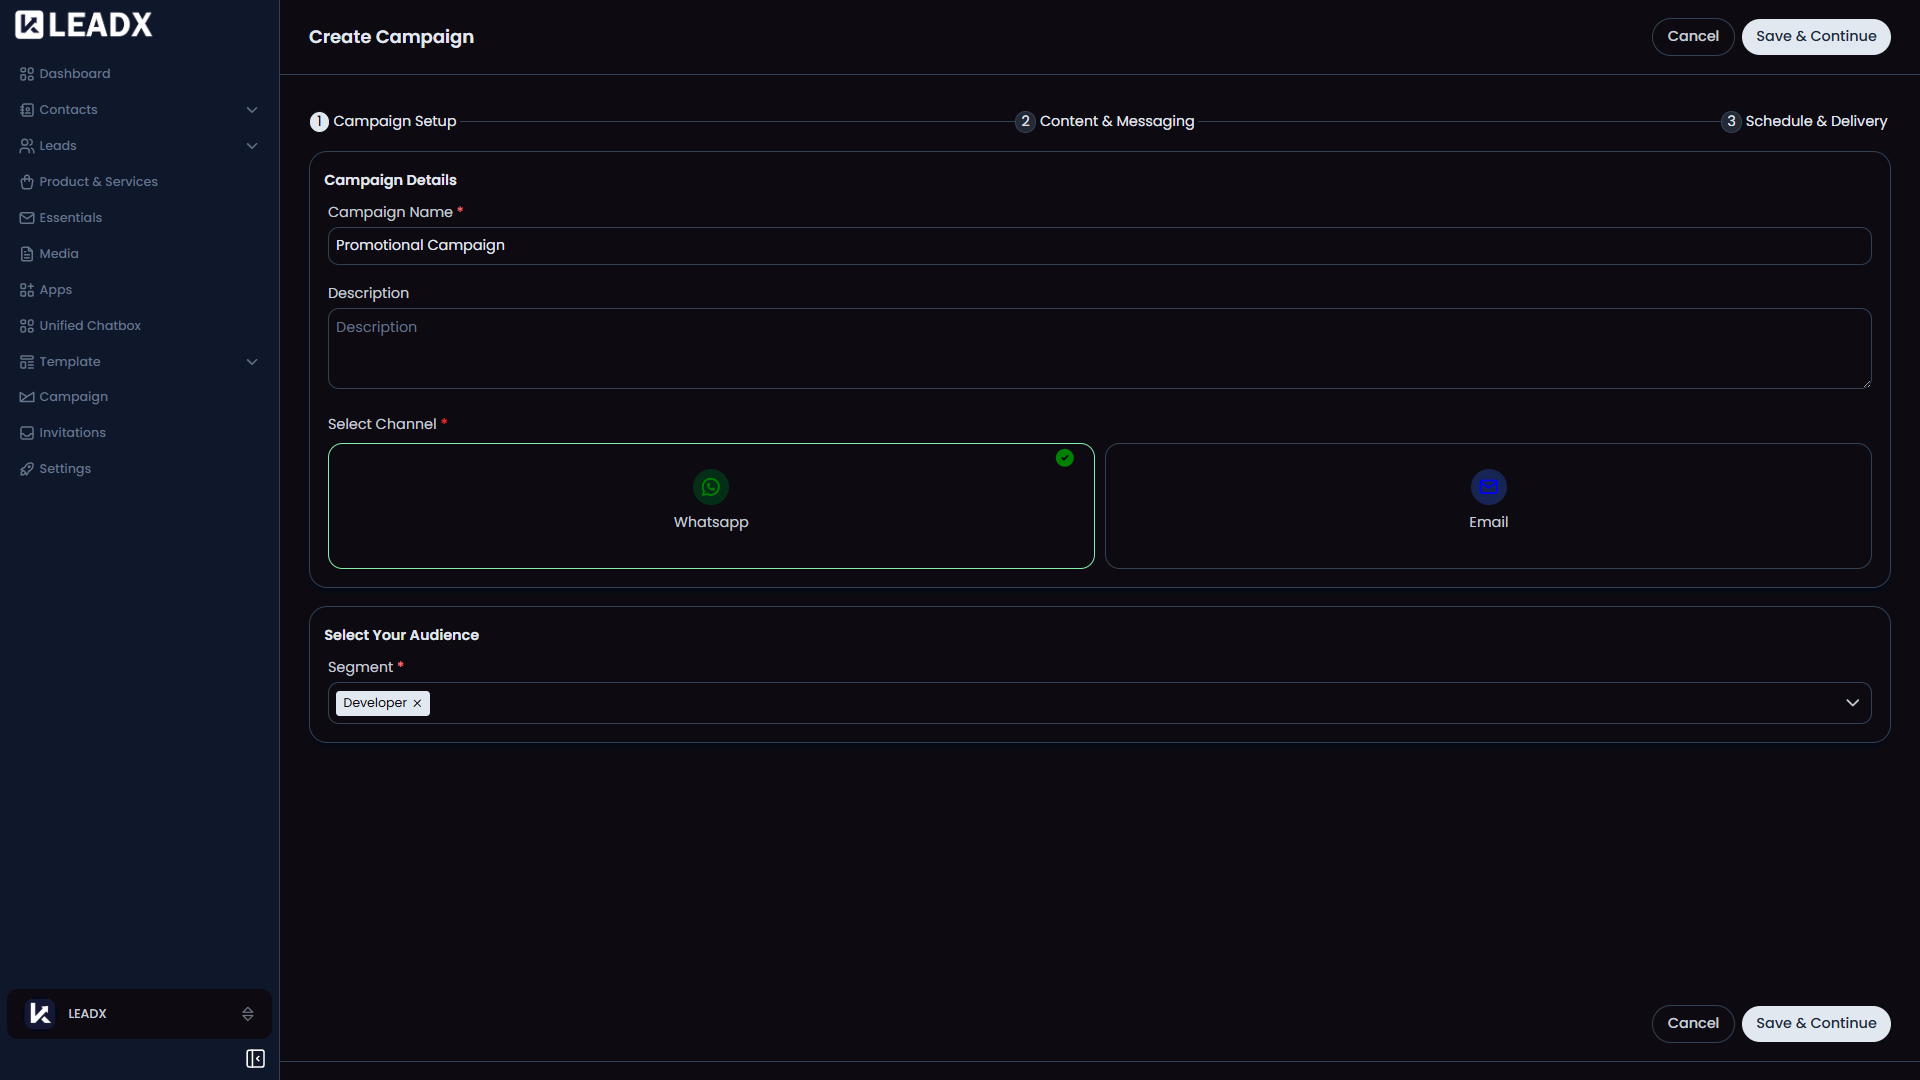
The Add Campaign page guides the user through a step-by-step setup process. Instead of filling everything on one long screen, LeadX breaks the work into smaller steps.
Access
- Route:
/create-campaign - Access: available to users who can create campaigns.
Step 1: Campaign Setup
- enter the campaign name
- choose the campaign type or channel
- choose the segment or audience
Step 2: Content & Messaging
- choose the message template
- review message-related options for the selected channel
- choose an SMTP setup when creating an email campaign
Step 3: Schedule & Delivery
- choose when the campaign should start
- optionally choose when it should end
- choose the sending window
- choose timing rules such as interval and days
Buttons Users Will See
Cancel/BackSave & Continue- final step buttons:
Save DraftLaunch Campaign
Important Notes
- Users can move through the setup one step at a time.
- Launch is blocked until the schedule details are valid.
- At least one day must be selected when the schedule requires it.
- After the setup is finished, LeadX returns to the Campaign page.